Django Service with Gunicorn
This will be a quick walkthrough of standing up basic Django with some fancy development tools like IntelliJ, mypy, and black. In addition to Django we will use DRF to implement a REST API and Gunicorn to expand on the basic Django runserver.
This guide acts as a precursor, setting the stage for future posts where this Django service will be utilized as a dependency of the SQS consumer we created in this guide https://honstain.com/asyncio-sqs-and-httpx/.
Why would you be interested in this write-up?
- You're looking for some practical examples of setting Django with IntelliJ.
- You're interested in Gunicorn configurations for Django services.
- This will give us some basic tooling to consider performance in future blog posts.
What this post is not:
- A replacement for the excellent Django tutorial https://docs.djangoproject.com/en/5.0/intro/. We assume you have gone through the tutorial or can wing it.
- Security or CI/CD - we are primarily focused on getting a service setup for experimenting with development tools and eventually scaling/performance issue (subsequent posts).
Overview of Key Dependencies
The dependencies most relevant to this blog:
| Dependency | Notes |
|---|---|
| gunicorn 21.2.0 | This is the thing subsequent posts will look at the most. https://gunicorn.org/ |
| djangorestframework 3.14.0 | The only real logic we create for this service will be a DRF endpoint and a Django model. This version doesn't officially support Django 5 but I wanted to try it anyway. https://www.django-rest-framework.org/# |
| django 5.0.2 | Giving the new version 5 a test drive. https://www.djangoproject.com/ |
| psycopg2-binary 2.9.9 | Needed for Postgres https://github.com/psycopg/psycopg2 |
| postgres:16.2 | The PostgreSQL docker image https://hub.docker.com/_/postgres |
| black 24.2.0 | I have been getting a ton of value here, ymmv. I love that it consistently and with no effort on my part produces very readable and organized formatting. https://black.readthedocs.io/en/stable/ |
| mypy 1.8.0 | Static type checker - I still bump into odd things, but have found the juice worth the squeeze. https://mypy.readthedocs.io/en/stable/ |
| poetry | Using poetry in place of pip, this feels more natural for production systems. |
Setup The Django Service
The idea here is to take the source code and get it running locally.
Get the Source Code
I have a public github repo you can pull or copy to get started.
Get Mamba or Decide on an Alternative
Similar to the previous SQS consumer post we are going to assume you are using mamba.

# CD into the project directory
mamba create -n django-user-service -c conda-forge  python=3.12
mamba activate django-user-service
pyproject.toml and Poetry
We will be using poetry to manage the python dependencies for this service.

This is the pyproject.toml for the repo https://github.com/AnthonyHonstain/django-user-service/blob/main/pyproject.toml
In the mamba environment you already have active:
pip install poetry
poetry install --no-root
Django and mypy
I set this Django service up using mypy, there was one thing I missed that you might also want to be aware of. Its not enough to just add mypy and django-stubs.
The mypy configuration file: https://github.com/AnthonyHonstain/django-user-service/blob/main/mypy.ini

Without the mypy configuration I ran into a number of mypy errors.
EXAMPLE ERRORS
❯ mypy .
usercore/models.py:5: error: Need type annotation for "name"  [var-annotated]
usercore/models.py:6: error: Need type annotation for "age"  [var-annotated]
user_service/settings.py:30: error: Need type annotation for "ALLOWED_HOSTS" (hint: "ALLOWED_HOSTS: List[<type>] = ...")  [var-annotated]
Found 3 errors in 2 files (checked 15 source files)
We have the django-stubs dependency set, but we need to help mypy along with that mypy.ini file.
References:
IntelliJ and Django
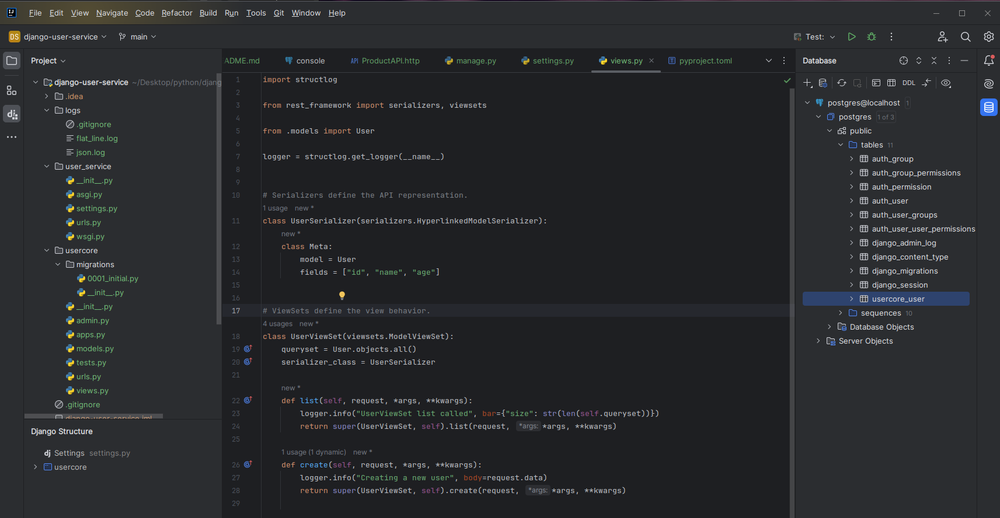
I will provide some examples of configuring IntelliJ to work with Django, I didn't find it super intuitive and hope this could help others.

You can skip this if you use an alternative editor.

Django and Python Black
I also found python Black to play nice with Django and have included an example screenshot of enabling the Black formatted automatically in IntelliJ. This automated the majority of the formatting activities.

Getting Django Running
Standing up the database
The core of this service is going to be a postgres database, which we will standup using docker compose.
docker-compose.yml
version: '3.8'

services:
  db:
    image: postgres:16.2
    volumes:
      - postgres_data_product:/var/lib/postgresql/data/
    environment:
      - POSTGRES_HOST_AUTH_METHOD=trust
      - POSTGRES_USER=postgres
      - POSTGRES_PASSWORD=postgres
    ports:
      - '5432:5432'
    # Logging for every query - can comment out the entire line to disable
    #     Reference: https://stackoverflow.com/a/58806511
    command: ["postgres", "-c", "log_statement=all"]

volumes:
  postgres_data_product:
Success looks like:

db-1 | 2024-02-27 15:02:00.353 UTC [1] LOG: database system is ready to accept connectionsConnect IntelliJ to the Database

It should only require you to set the user and password from the docker-compose file.

You won't have much to look at until you run the migrations.

Run the Django Migrations
You can start running the manage.py commands to initialize your Django service.
python manage.py migrate
You can refresh the postgres schema in IntelliJ to view the results of the migration. Success looks like you now have a table called usercore_user.

This is also a reasonable time to create a superuser for local development.
python manage.py createsuperuserOverview of the API
This service uses DRF https://www.django-rest-framework.org/#installation to serve as a basic REST API.
The model here is just a laughably basic user with three fields.
from django.db import models


class User(models.Model):
    name = models.CharField(max_length=200)
    age = models.IntegerField()
And we will make a basic DRF ModelViewSet for it.
import structlog

from rest_framework import serializers, viewsets

from .models import User

logger = structlog.get_logger(__name__)


# Serializers define the API representation.
class UserSerializer(serializers.HyperlinkedModelSerializer):
    class Meta:
        model = User
        fields = ["id", "name", "age"]


# ViewSets define the view behavior.
class UserViewSet(viewsets.ModelViewSet):
    queryset = User.objects.all()
    serializer_class = UserSerializer

    def list(self, request, *args, **kwargs):
        logger.info("UserViewSet list called", size=str(len(self.queryset)))
        return super(UserViewSet, self).list(request, *args, **kwargs)

    def create(self, request, *args, **kwargs):
        logger.info("Creating a new user", body=request.data)
        return super(UserViewSet, self).create(request, *args, **kwargs)
Running the service python manage.py runserver if you haven't already will let us exercise the endpoint using the DRF UI.
http://localhost:8000/usercore/users/

You also have the basic Django Admin UI http://localhost:8000/admin/


IntelliJ HTTP Client
I found the IntelliJ HTTP client to be a handy way to exercise simple endpoints, postman would also work here.

### GET request list
GET http://localhost:8000/usercore/users/
Accept: application/json

### GET request single record
GET http://localhost:8000/usercore/users/40000/
Accept: application/json

### POST request create single record
POST http://localhost:8000/usercore/users/
Accept: application/json
Content-Type: application/json

{"name":"Anthony", "age":2}
Starting Gunicorn
The Django runserver is useful for local development, but we want to get a more capable web server more detailed investigation.
Since we should have already installed gunciorn with our python dependencies, we can start it using:
gunicorn --log-level debug --bind 0.0.0.0:8000 user_service.wsgi -w 1This uses the wsgi module Django already created for us, and sets one default worker.

Shooting a few calls into the server should look something like this:

This service is also setup with structlog and emits JSON formatted logs to the logs folder in the project directory.

tail -f json.log | jq


{
  "request": "GET /usercore/users/",
  "user_agent": "Apache-HttpClient/4.5.14 (Java/17.0.10)",
  "event": "request_started",
  "ip": "127.0.0.1",
  "request_id": "f4449541-2eea-4337-ad63-fb24de0c0d35",
  "timestamp": "2024-03-15T15:06:48.697754Z",
  "logger": "django_structlog.middlewares.request",
  "level": "info"
}
{
  "size": "3",
  "event": "UserViewSet list called",
  "ip": "127.0.0.1",
  "request_id": "f4449541-2eea-4337-ad63-fb24de0c0d35",
  "timestamp": "2024-03-15T15:06:48.767477Z",
  "logger": "usercore.views",
  "level": "info"
}
{
  "code": 200,
  "request": "GET /usercore/users/",
  "event": "request_finished",
  "ip": "127.0.0.1",
  "user_id": null,
  "request_id": "f4449541-2eea-4337-ad63-fb24de0c0d35",
  "timestamp": "2024-03-15T15:06:48.770240Z",
  "logger": "django_structlog.middlewares.request",
  "level": "info"
}
Summary
At this stage you should now have a Django service with DRF that can serve a basic API via Gunicorn (and has logging, tests, and a real PostgreSQL database).
In subsequent posts, we will explore more of having our SQS consumer, call this service.


